Monthly Archives: December 2014

Easy Salty and Sweet Christmas Bark

I used to go with my mom to a small chocolate store half an hour from where we lived in Illinois every December. We would pick up bags of red, green, brown and white melting chocolate which we would bring home, melt and pour into different Christmas molds like wreaths, bells and snowmen. I really miss that. I hadn’t played with melting chocolate since then which was way too long ago. I found melting chocolate at Target and next thing I know, I’m throwing pretzels, chocolate cookies and peanut M&Ms into my cart. I ended up making this Easy Salty and Sweet Christmas Bark.

Why haven’t I been doing this before? Making bark is SO easy! And now that I know that, I’ve been looking up different kinds of bark on Pinterest and my mind is reeling. I want to make more! Now that I know where to find melting chocolate, how easy it is to work with and how stinking good it is, I’ll start making bark all year, not just during the holidays!

FullSizeRender1

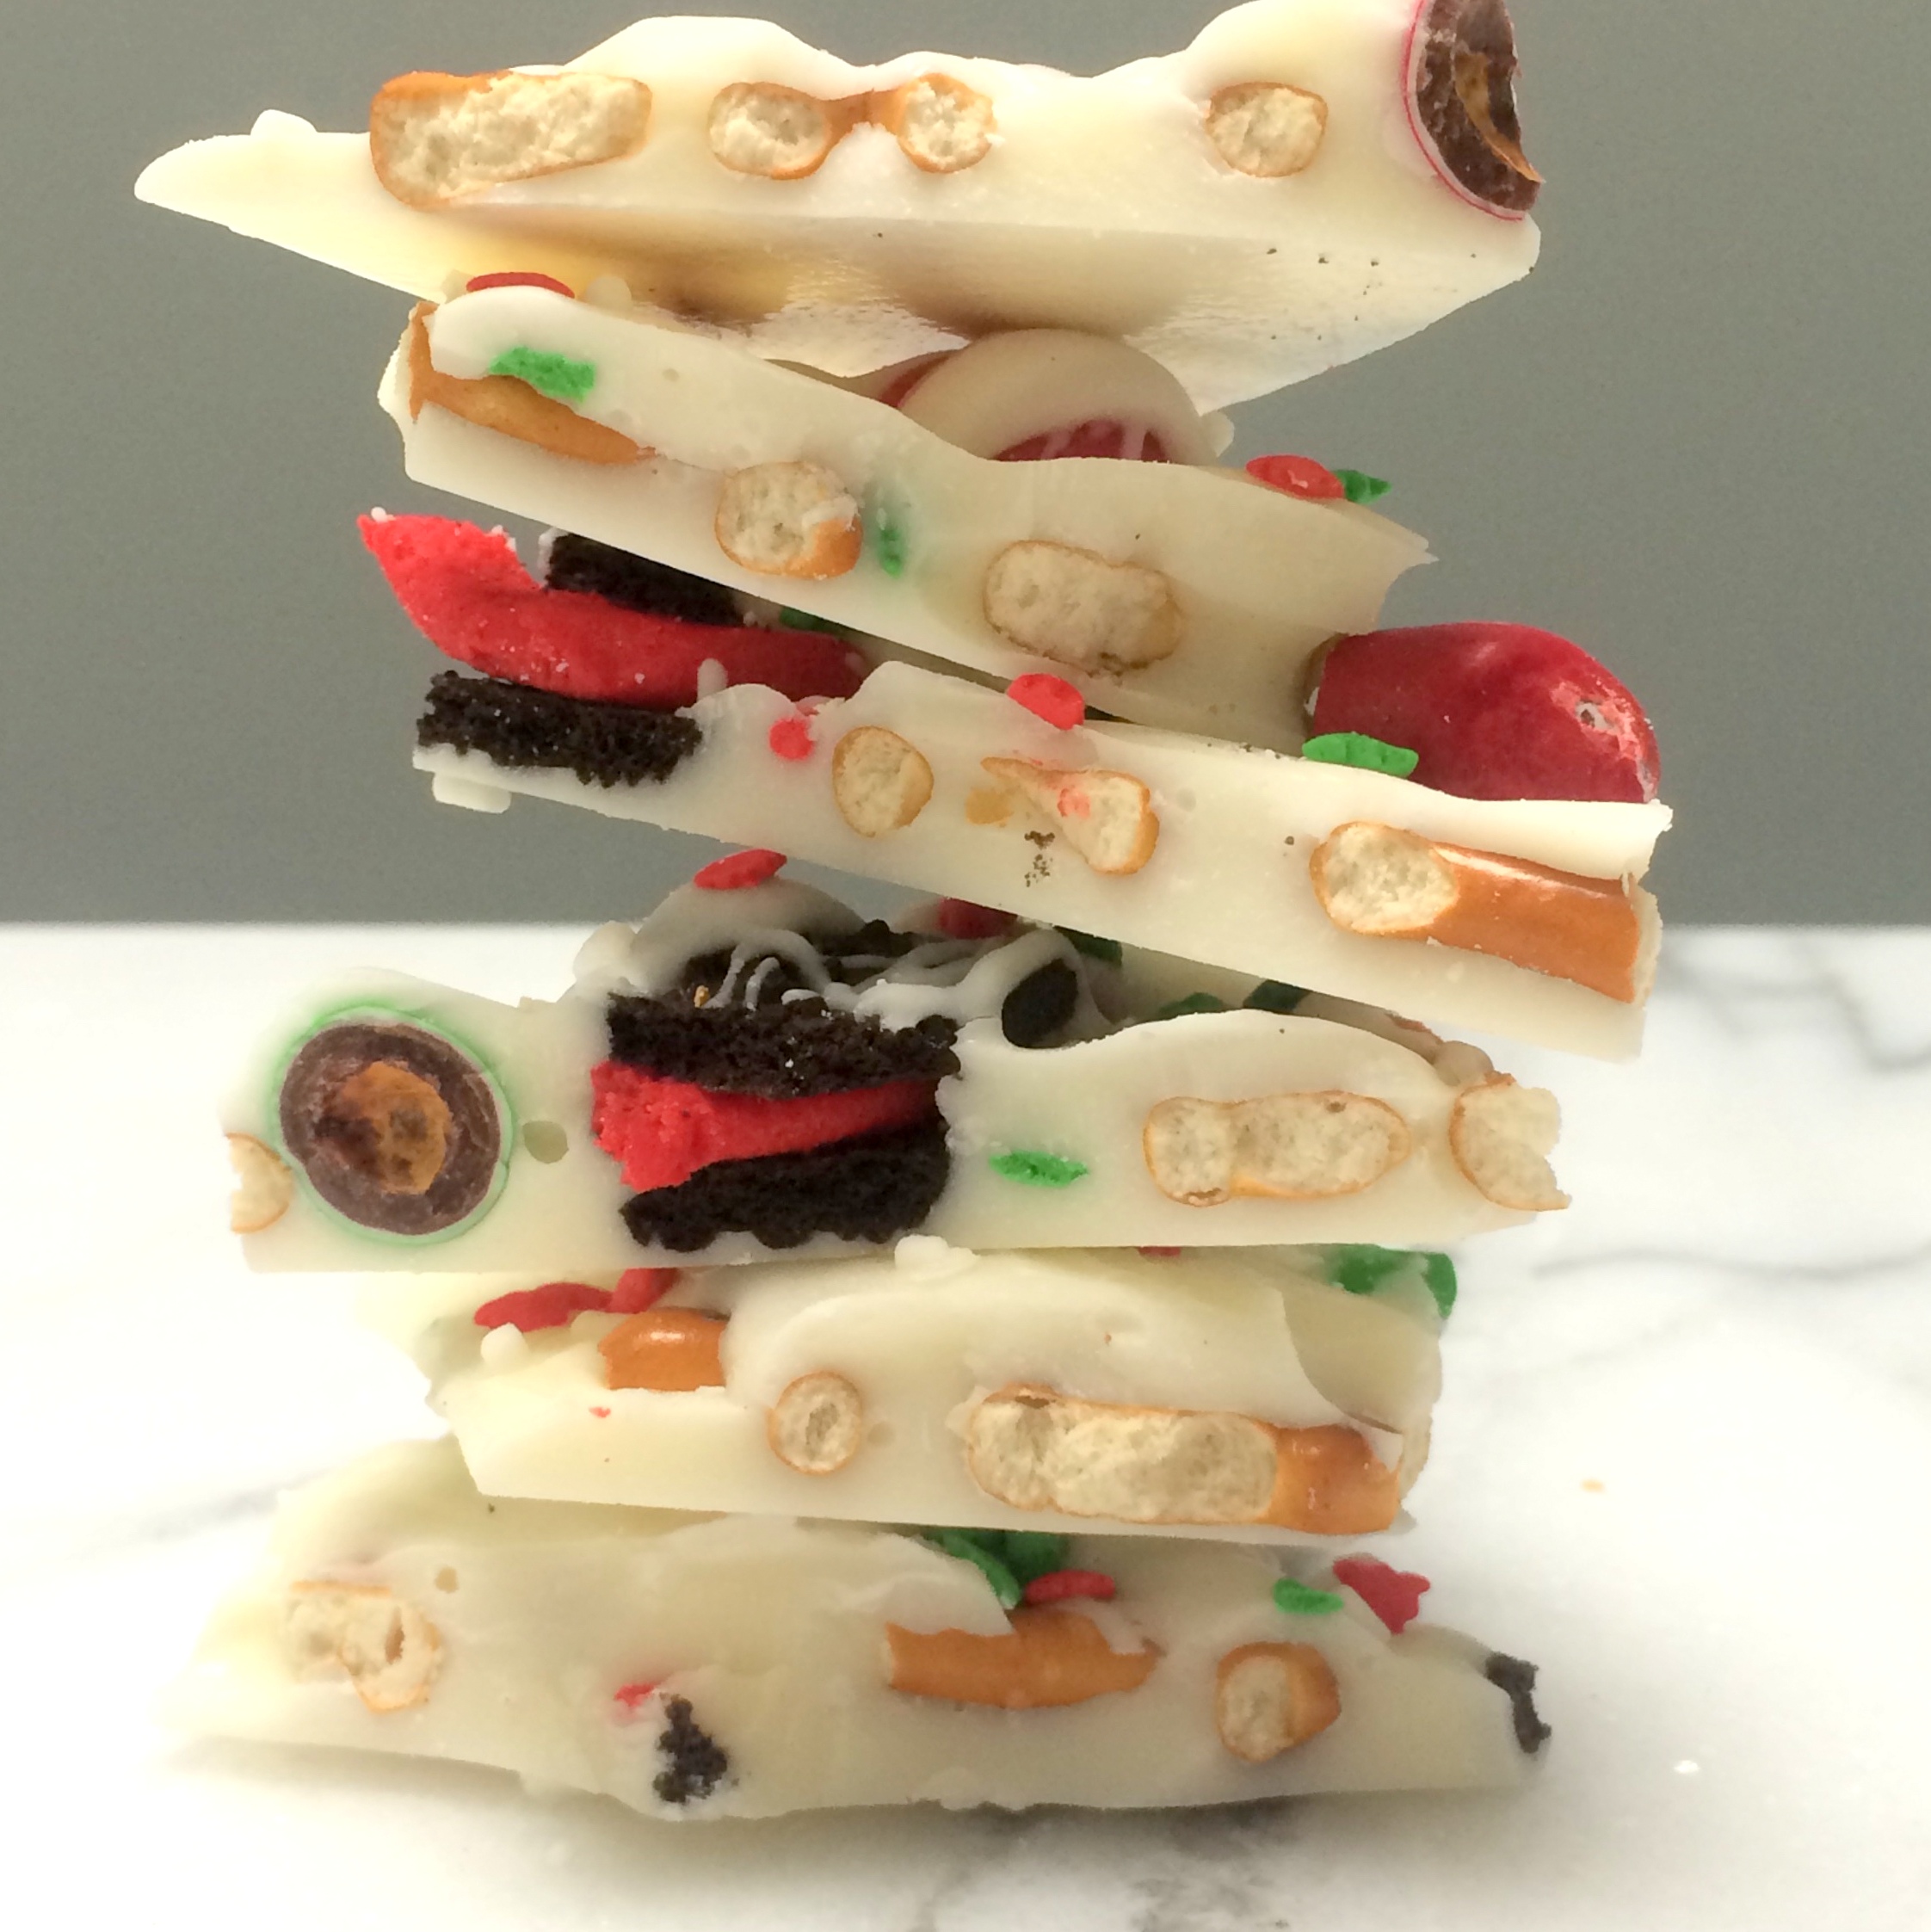
Easy Salty and Sweet Chocolate Bark

  • 1 pound white melting chocolate (I used CandiQuik vanilla candy coating)
  • 1 cup pretzels (preferably holiday shapes – trees, bells & stars)
  • 6-8 chocolate sandwich cookies with red or green filling (like Oreo)
  • red and green m&ms (regular or peanut)
  • red and green sprinkles

Line a baking sheet with a silicone liner or wax paper; set aside. Chop cookies into 1/4th; set aside. Melt chocolate according to package directions. Pour half the melted chocolate onto the baking sheet; spread to approximately 1/4 inch thick.

IMG_2331

Working quickly, add the pretzels, cookies pieces, m&m’s, and sprinkles over the chocolate in a sporadic pattern.

IMG_2332

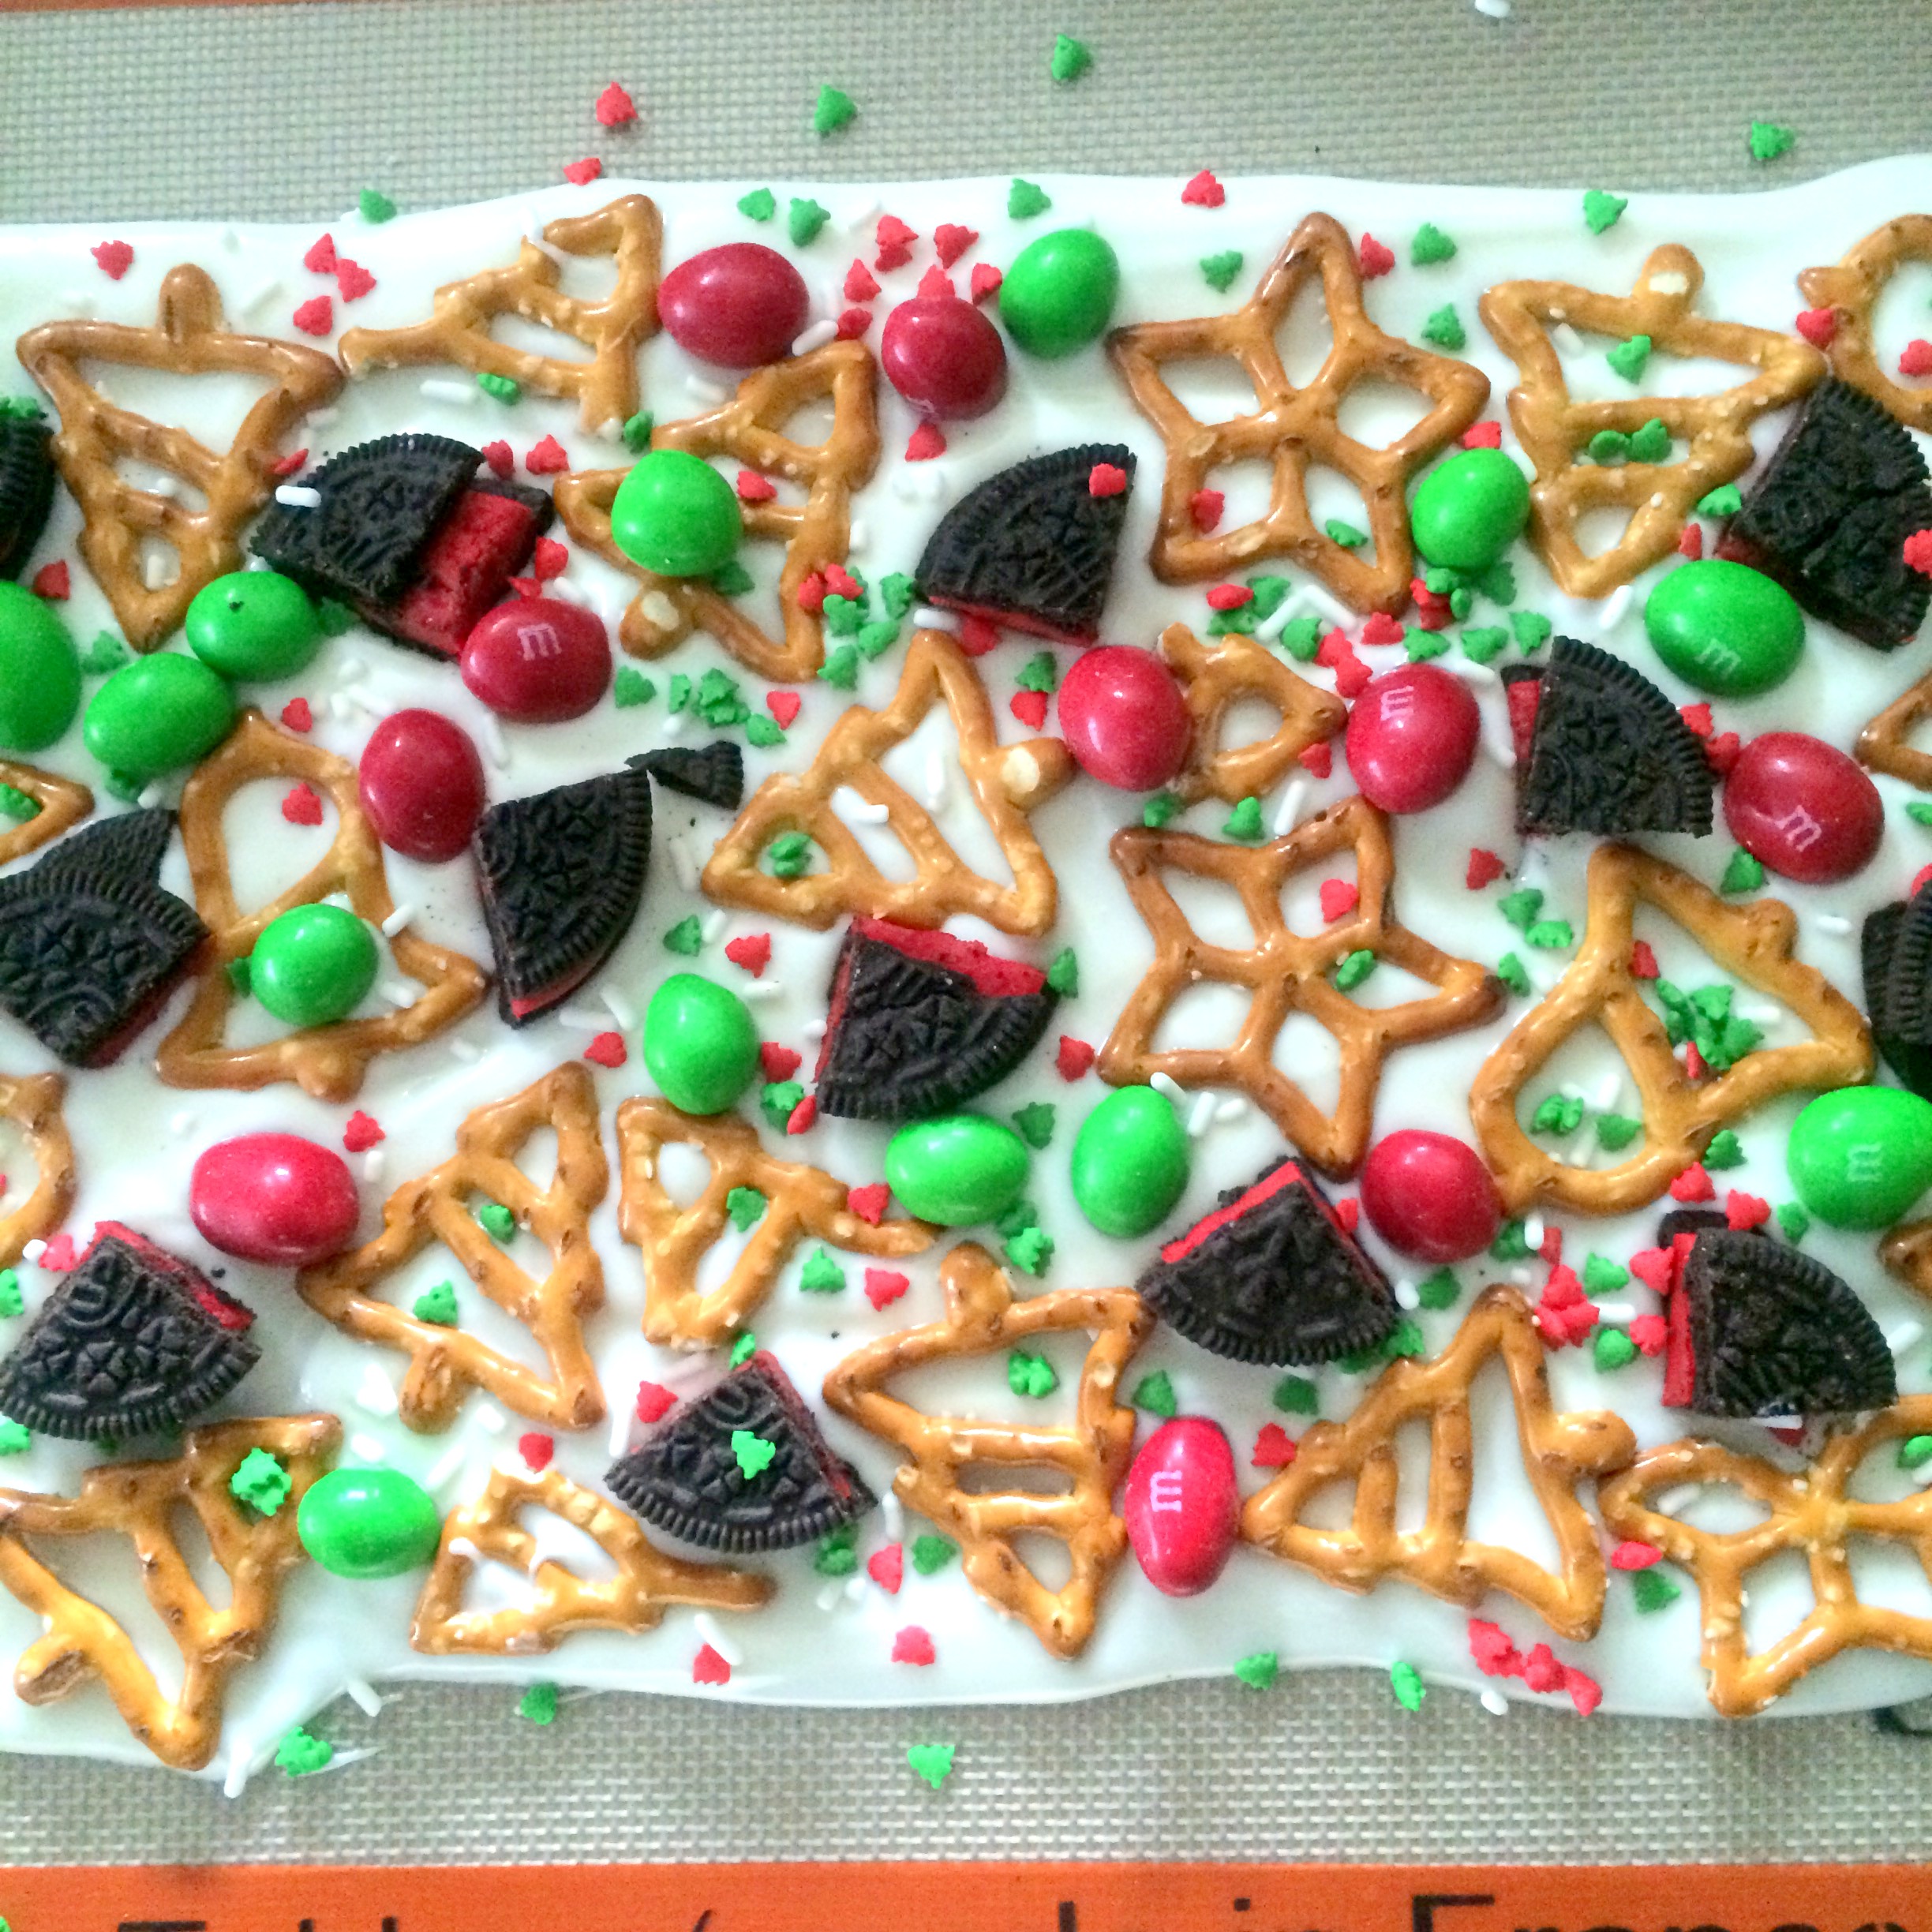
Drizzle the remaining melted chocolate on top of the pretzels and cookies. Garnish with additional sprinkles; if desired.

IMG_2333

Place the baking sheet in the refrigerator for 10 minutes to allow the chocolate to set. Once set, break the bark into pieces.

IMG_2394

Chocolate-Pistachio-Cherry Biscotti

I didn’t grow up familiar with biscotti. I’ve only ever made it once and each time I make it, it seems daunting. But even though there are a few steps, it really is easy. I took some of this Chocolate-Pistachio-Cherry Biscotti to the Philadelphia Eagles tailgate I went to on Sunday and saw someone eat one, then walk over and grab another one. I hadn’t even tasted one yet so I tapped him on the arm and asked him how they were. “The best biscotti I’ve ever had,” he said. His wife agreed and said she’d never seen him eat TWO biscotti. I was thrilled!

With a chocolate dough base, these biscotti have dried cherries (my fave!) and pistachios mixed into the dough giving little flecks of red and green that seem so appropriate for the holidays. Dried fruit and nuts are such an amazing combination and putting them in a cookie is a great way to enjoy them without having to cut into a fruitcake. With one end dipped in a little semi-sweet chocolate and drizzled with white chocolate, these will sure to satisfy your chocolate sweet tooth.

IMG_2387

Preheat oven to 350°F. Line 2 baking sheets with parchment paper. Beat butter and sugar at medium speed with an electric mixer until fluffy. Beat in eggs and vanilla.

IMG_2305

Combine flour, cocoa, baking soda, and salt in a large mixing bowl. Add flour mixture to sugar mixture, beating until blended.

IMG_2306

IMG_2308

Stir in pistachios and cherries.

IMG_2311

Place half of dough on each prepared baking sheet. Shape each half into a slightly rounded log about 10 x 3 inches using floured hands. (Dough will be very sticky.)

IMG_2313

Bake 25 to 30 minutes or until dough is firm to the touch. Let cool completely on baking sheet on a wire rack.

IMG_2317

Transfer logs to a cutting board, and cut into 1/2- to 3/4-inch-wide slices with a serrated knife. Place slices, cut sides down, on a baking sheet. Bake 4 minutes on each side or until crisp. Transfer to wire racks to cool completely.

IMG_2329

Dip ends of biscotti in dark chocolate, and drizzle with white chocolate, if desired.

IMG_2335

Place on wax paper to set.

FullSizeRender

Additions: None

Omissions: None

Substitutions: None

Overall Rating: Love It

Source: Coastal Living magazine

Chewy Molasses Cookies

This really is my favorite time of the year. And I’m not just talking about Christmas time. I’m talking about cookie time! I know I can make cookies at any time during the year but the truth is I don’t. So I get giddy like I a little kid when I can carve out a weekend day to spend hours in my kitchen covered in flour baking batch after batch of cookies and treats. I had a lot going on this past weekend but I didn’t let anything get in my way when it came to baking on Saturday morning. The first cookie I decided to make were these Chewy Molasses Cookies.

Similar in flavor to gingerbread, these molasses cookies are soft, chewy, and mouthwatering. With warm spices of cinnamon, ginger, and ground cloves, these treats scream happy holidays and belong in anyone’s cookie jar. Ginger and spice and everything nice? Check! As much as I love baking cookies, I don’t like having cookies in my house so I bake for my family instead. We all live far apart and I love nothing more than filling up a tin of cookies, shipping them away, and having my family thankfully appreciate them. It makes me warm and fuzzy. Kind of like these cookies.

IMG_2315

Weigh or lightly spoon flour into dry measuring cups; level with a knife. Combine flour and next 6 ingredients (through salt) in a bowl, stirring with a whisk. Place butter, 5 tablespoons granulated sugar, and brown sugar in a large bowl; beat with a mixer at medium speed 5 minutes or until fluffy. Add egg; beat 30 seconds.

IMG_2301

Add molasses; beat just until combined.

IMG_2303

Add flour mixture to butter mixture; beat at low speed or just until combined. Cover and chill 30 minutes.

IMG_2304

Preheat oven to 350°F. Shape dough into 24 balls, about 1 1/2 tablespoons each. Roll balls in remaining 3 tablespoons sugar; place 2 inches apart on baking sheets covered with parchment paper. Bake at 350°F for 12 minutes or just until set.

IMG_2310

Cool 3 minutes on pan; remove to a wire rack.

IMG_2314

Additions: None

Omissions: None

Substitutions: None

Overall Rating: Love It

Source: Cooking Light magazine